1. The brief comes before the model
Every print begins with a question: what is this object for? A display piece, a desk accessory, a prop, or a custom gift all behave differently. If the piece will be handled often, we pay attention to wall thickness and weak points. If it is mostly decorative, we can push detail further and make the silhouette more ambitious. A good brief saves time because it sets the target before any sculpting starts.
We also collect reference images and decide what must stay accurate and what can be simplified. The point is not to copy reference material blindly. The point is to identify the parts that give an object its identity. That may be a shape, a panel line, a facial feature, a logo placement, or a repeated surface rhythm. Once that identity is clear, the rest of the design can support it instead of fighting it.
2. Sketching sets the proportions
We usually start with rough sketches or a quick blockout in 3D. This stage is about proportions rather than detail. We are looking for balance: how wide the base should be, where the visual weight should sit, and whether the piece reads clearly from a distance. A model can be technically correct and still feel off if the proportions are too tall, too busy, or too flat.
In the workshop, this is where we make fast decisions about scale. A print that is too large can increase print time and fail more easily. A print that is too small can lose texture and become fragile. We adjust both the design and the target dimensions until the object sits in a range that makes sense for production. This is also where we decide whether the model should be split into parts, because one-piece convenience is not always better than clean assembly.
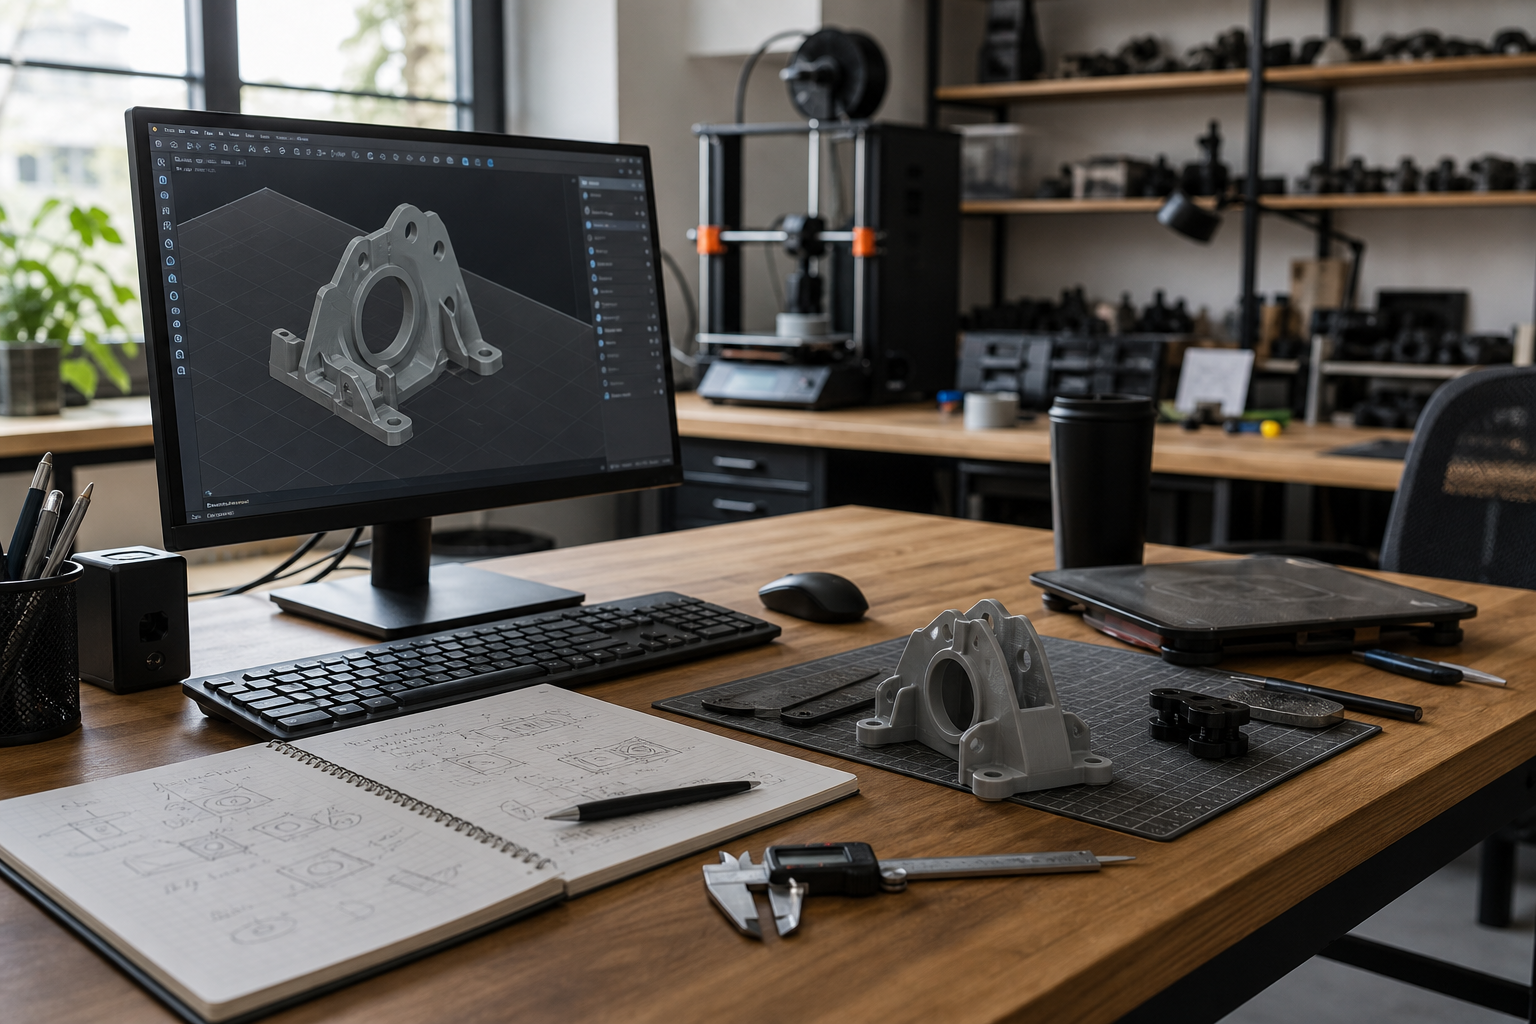
3. CAD work turns the sketch into a printable object
Once the shape is settled, the model moves into CAD or sculpting software. This is the part people often imagine as the whole process, but it is really only one stage. We build thickness into thin areas, add tolerances for joints, and remove tiny details that would disappear on the printer anyway. Surface detail is useful only when it can be resolved in the final material and at the final scale.
Print orientation matters here as well. A design with a dramatic overhang can look better in a render than in a slicer preview. If the geometry creates excessive supports, visible scars, or unstable layers, we change the structure rather than hope the printer will compensate. We would rather simplify a hidden underside than spend hours cleaning a problem that should have been designed out earlier.
A useful rule in the workshop is that the model should already know how it will be built. If a part needs support, we prefer support that is easy to remove. If a seam is unavoidable, we hide it where the eye will not rest. Small decisions like this are what make a print feel thoughtful instead of merely possible.
4. Test prints expose the truth
No render tells us as much as a test print. A small prototype reveals whether a curve feels right in the hand, whether a socket fits with a little tolerance, and whether a fine surface detail still reads after layer lines appear. We do not treat prototypes as failures. They are the fastest way to discover what the digital version hides.
During testing, we measure where the design needs reinforcement, where the edges feel too sharp, and where the visual rhythm breaks. Sometimes the right answer is a tiny adjustment. Sometimes it is a more aggressive redesign. Either way, the prototype gives us a reality check before production begins. That saves material, reduces waste, and keeps the final product more consistent.
5. The final file is a production decision
A finished model is not just a prettier file. It is a decision about what we are promising the printer, the material, and the person who will receive the object. Before we lock a file, we check scale, orientation, wall thickness, support strategy, and the surface finish the material can realistically achieve. If any of those parts feels uncertain, the file is not ready yet.
That is the design philosophy behind 4leafx prints. We want pieces that look like they were imagined carefully, but also built carefully. The best result is when the final object feels inevitable, as if the shape simply had to become physical once the right choices were made. That only happens when design and production are treated as one workflow from the start.